posted
Thanks so much for all the kind words, guys!
I started this just on a whim... just to see if I could do it... and it wound up being my favorite LMB-related project.
It takes a long time for me to do these, because I don't really have a "natural" talent for this type of thing - like Jesse321 who does those Legion busts. It's more like I just try my best to work to an image I like and just keep at it until it looks right.
I'm really lucky that there are so many talented artists on Legion World that have done portraits of these characters in the past for me to draw from. It's really cool when I see a Sketch Lad, or Joe Boy, or deddy drawing and I'm like, "Yeah! That's what I want to do."
quote:Originally posted by Cobalt Kid: I had no idea Cobalt Kid was in the queue!
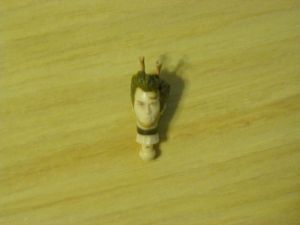
Yeah... I found a perfect "Cobie" head a while back:
but the figure itself is way short, so I've been scouting around for good torso that would both look proportionate to the head, but notch up the height.
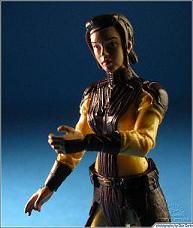
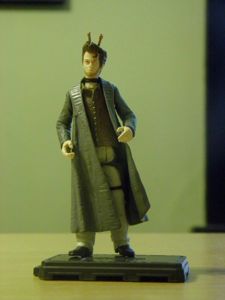
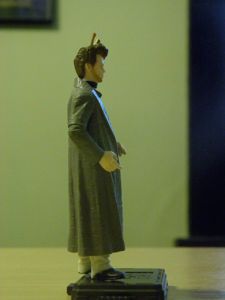
The other one that I have in the hopper that I'd like to do soon is Shadowplay in Candlelight Lass. I have a really nice figure picked out that I want to use called "Bastila Shan":
but for some reason, that fig is insanely expensive on ebay. I'll keep stalking it, though... one of these days I'll nab it cheap.
And then there's Rocky... and Lash... and Fat Cramer... and Ibby... and Peebs... and...
Well, let's just say I think I found a nice retirement hobby.
-------------------- See Here for the latest update on the 2013 Chicago Gathering (now including tentative attendance list)
Registered: Feb 2008
| IP: Logged |
I, for the record, always associate the big blond 'fro with EDE, but he has so many looks its hard to go wrong.
From: Vancouver, BC, Canada | Registered: Dec 2003
| IP: Logged |
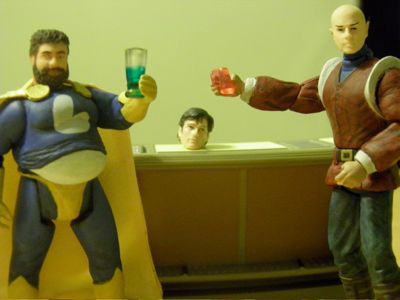
Mystery Fellow: Sorry, boys... I like Cobie as much as the next guy, but it's not his time just yet.
Lard Lad: What?! How dare you?
Dev Em: Just who do you think you are?
Mystery Fellow: I might not be much to look at, yet... but just give it time. Before too long, you'll both be calling me... Eryk.
**************************
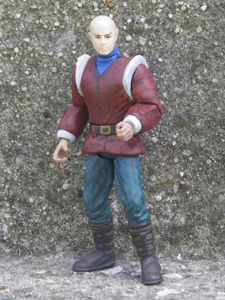
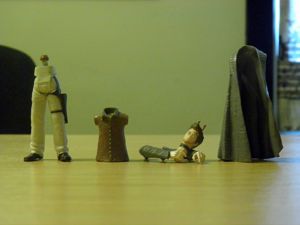
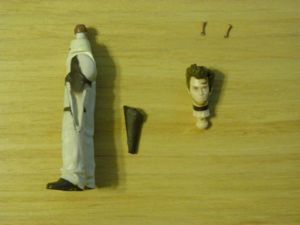
That's right, LMB fans... the base for the third addition to the LMB Action Figure Collection was waiting for me when I got home tonight (along with his spiffy little bar set).
I just can't wait to stick him in some boiling water, pull off his arms and legs, and start hacking him up.
In other words, just another typical weekend at Exnihil's.
Up next: "Ester's My Destination".
-------------------- See Here for the latest update on the 2013 Chicago Gathering (now including tentative attendance list)
Registered: Feb 2008
| IP: Logged |
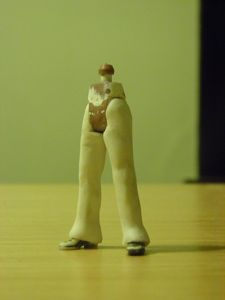
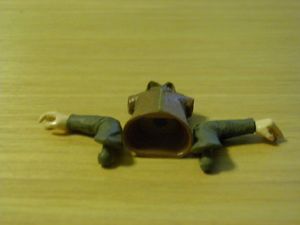
Okey-doke, so we've got our EDE base figure, and it's time to start disassembly.
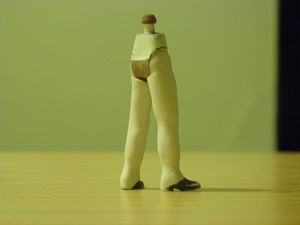
The figure, although a really good sculpt, has some balance problems. Because of the weight of the trench-coat piece, it wants to keep tipping backward, and will only stand up with the aid of a peg stand:
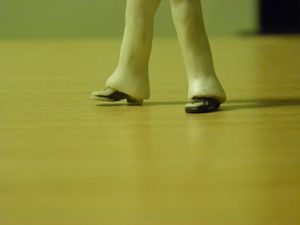
The true test will be - after that's removed - if the legs will stand on their own.
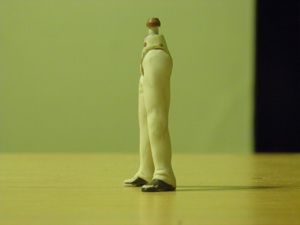
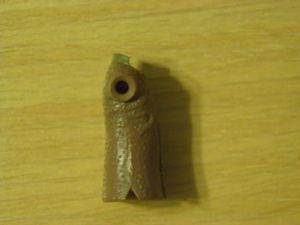
I took the guy down to the kitchen where, with the aid of some boiling water, I removed the head and arms - after which the trench-coat just slips off - and separated the upper torso from the legs:
As you can see, the legs are balanced just fine on their own.
The torso and leg assembly are somewhat interesting, in that they, too, are able to be easily popped apart. With previous figures I had to crack the torso if I wanted to get at the waist. This will make it more convenient to work on the legs as I can just leave them attached as they are.
I'm not going to be using the trench coat at all for this figure (I'm just going to build EDE's jacket over the shirt and make it non-removable). I'll probably repurpose the coat later on when I do the Cobalt Kid one.
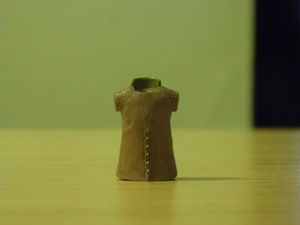
The torso also is of a unique design to me:
... being a hard plastic shell from the shoulders to about the bottom of the ribcage, but then covered with a more rubbery plastic, making the bottom half inch or so hollow.
This will make it easier, I think, to do some nice detail-y things around the collar and the bottom of the shirt although (as I learned with the Dev figure) I'll have to be really careful with the heat I use to bake any clay. This will definitely have to be cured with the hairdryer, not in the oven.
For the head:
... I was thinking I was going to thin out the existing choker to match the EDE one but, on reflection, I think I'm just going to sand that right off and build my own.
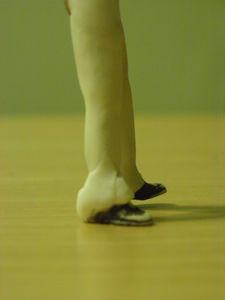
Now that I had him all broken down, I use my X-acto knife to get rid of those antennae and the leg holster:
The antennae I'm going to save and use down the road for when I do the "Durlan" version of the Dev-Em head.
The holster I'll save, as well, in case I ever need it. (maybe for like Space Ranger or something)
As you can see in the pic above, the holster well is actually a notch that was cut into the leg. I think I'll use that as the impetus to determine the starting point for my modifications.
For the next update, I'll be reshaping the legs to have a more "spandex" look from the knees up, and then flaring into EDE's bell-bottoms from the knees down.
-------------------- See Here for the latest update on the 2013 Chicago Gathering (now including tentative attendance list)
Registered: Feb 2008
| IP: Logged |
posted
OK, I know it's been super long since I've worked on this project, but I figured - with the impending move - it might be a good time for a shift in creative gears again.
So, let's see... where were we six months ago?
That's right... the legs.
OK... so - starting slowly to get back in the hang of this - I figure the easiest bit will be sanding down the somewhat "corduroy" looking pants to be more of a tight fitting spandex.
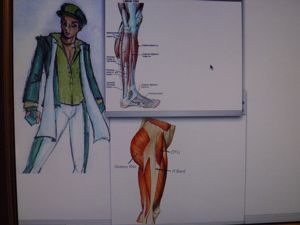
Since it's not as though there is an actual "leg" shape somehow hidden below the existing shape (and I'm not really some sort of artist who has actually studied anatomy or anything) I have to follow a guide to make sure I'm getting the proportions right:
Like I say, I just picked this up again tonight... so I'll probably be a couple days before posting the reshaped pics.
If anyone should ask for me... I'll just be over here...
...sanding down Eryk's ass.
-------------------- See Here for the latest update on the 2013 Chicago Gathering (now including tentative attendance list)
Registered: Feb 2008
| IP: Logged |
Bit of a boring update - but also a good bit of work done - so feel free to read on if you are hard core fan of these; otherwise... I won't be offended if you give the text a miss and just scan the pretty pics.
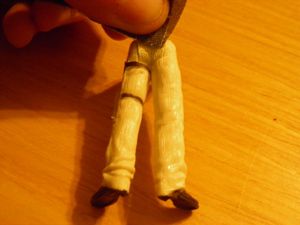
So, a quick recap of what Eryk's legs looked like a couple days back:
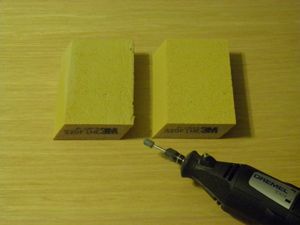
After hitting them for a bit with a dremel grinding bit and a couple different grains of mild sanding pads:
...all the fabric-like texture is gone and they now look a bit more shapely:
Hubba-hubba.
I mostly sand-shaped just the left leg - as you might recall that the right leg had that notch where I cut off the holster. So once I had the left one done, I matched the shape on the right using sculpting clay, filling in the notch and building it up, as it was a bit thinner:
Once the legs were looking somewhat "spandex"-y, I then had to start working on making Eryk's bell bottoms. This is a fairly easy bit, as you just have to wrap the bottom of the leg in a wad of clay:
... and then just keep blending it upward into the leg:
Bake the whole mess at 215 degrees for a few minutes and you've got yourself the lower half of an Eryk Davis Ester:
I still have to sand the bottom of the cuffs to get a sharper edge, and - dependent on how it looks when I'm done - I might increase the flares more, but I think we've at least got a pretty good start.
-------------------- See Here for the latest update on the 2013 Chicago Gathering (now including tentative attendance list)
Registered: Feb 2008
| IP: Logged |
All right... I'll be coming back to the legs for a little more work later on, but - since I'm in cutting and sanding mode - let's set them aside for now and focus in on the torso.
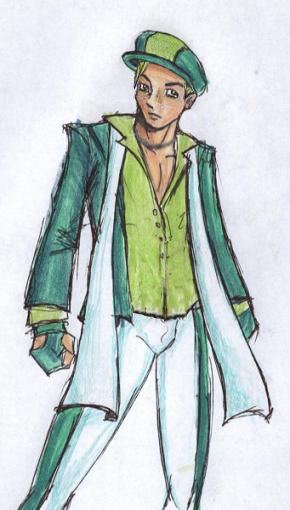
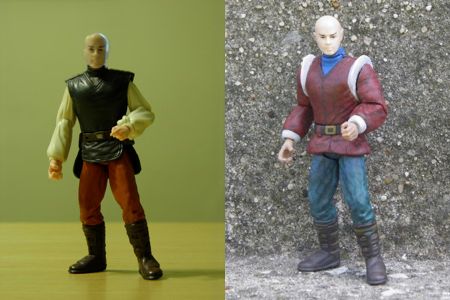
A quick reminder of the goal image:
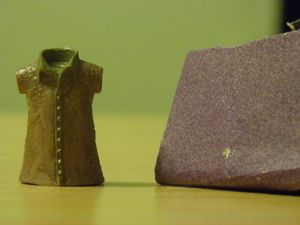
OK... so Eryk's torso is basically a three-layer build: I need to sculpt up his chest, then reshape his shirt over that, then build a jacket on top of that. The scarf I'll make out of fabric.
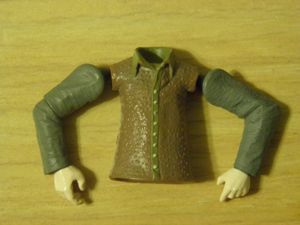
Here is the base that I'm working from:
The arms, you'll recall, are part of a trenchcoat design, so when I get to doing the jacket sculpt, I'll use those as a guide to how thick it needs to be. For now though, I'll focus on the chest and shirt portion.
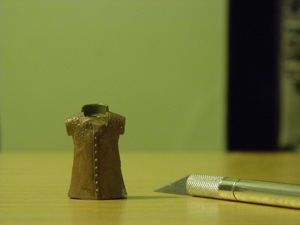
First thing I need to do is get rid of the texture. The shirt on the base figure has this "bumpy" texture that I need to flatten out with sanding:
Since most of it is going to be covered by the jacket anyway, I don't need to sand the whole thing, just the portion where the shirt will be exposed.
Next off, I have to get rid of the existing collar... just a quick X-acto knife surgery:
I'm leaving the back part on for now to act as guide, but that will eventually be removed as well.
Next up, the open shirt collar. Although I'm going to be trying to reuse as much of the existing button design as I can, there is a clear point - just below the breast line - that I need to target as the launching point for the customization.
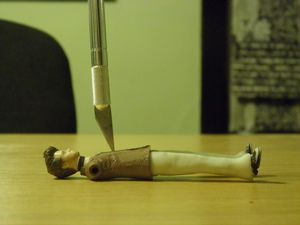
A quick bit of reassembly to ensure that the proportions are correct and.... "X" marks the spot:
I thinly sliced off the existing design, and continued sanding it down to a smooth workable surface:
The last bit of cutting and sanding was on the bottom of the shirt. The shirt of the figure itself has a flat bottom, but you can see in the Eryk drawing that his shirt has a more natural curvature like a dress shirt would because of the side "notches".
These will obviously be covered by the jacket in the final product, but - for now - making a small notch on either side:
... and then sanding it toward the front will give the shirt the more realistic curves.
That pic above also gives a good idea of the now flattened chest area on which I'll be sculpting Eryk's chest.
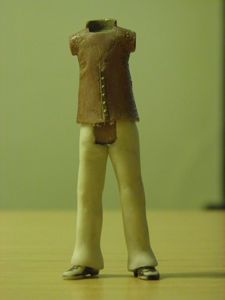
So... final sanding and, voila... the modified base torso that now I can start building back up:
Next up... well... I do start building it up.
-------------------- See Here for the latest update on the 2013 Chicago Gathering (now including tentative attendance list)
Registered: Feb 2008
| IP: Logged |


 Hyperpath: Email this page to someone!
 Printer-friendly view of this topic | Subscribe To Topic


![[Wink]](wink.gif)

![[Poverty Lad]](graemlins/PovertyLad.gif)
![[LOL]](graemlins/lol.gif)
![[Roll Eyes]](rolleyes.gif)