-------------------- Just when you thought it was safe to go back in the water...
From: The waters off eastern Long Island | Registered: Jul 2003
| IP: Logged |
posted
^ Yeah, I'm drawn in like watching a workshop television special. It's so cool to watch you hit each new step.
From: If you don't want my peaches, honey... | Registered: Sep 2003
| IP: Logged |
posted
Thanks, guys! I'm glad you're having as fun watching the process as I am doing it.
This next chapter in the ongoing Lard Lad action figure saga, though, will painfully demonstrate exactly why I said this project is not a tutorial.
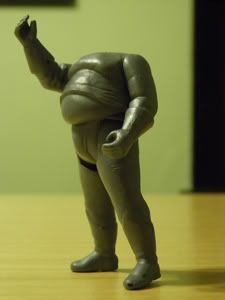
So, when last we left headless Lardy, he was all primed up and looking pretty spiffy:
I was just waiting for the tackiness to dry up so I could sand it.
So I waited.
And waited.
And waited.
Two and half days later, he was exactly the same consistency, nowhere near ready to sand. I tried using a hairdryer to hasten the drying process... but nothing.
What had I done wrong? Well... whenever I'm in need of sage advice, I consult a message board, so I started hopping around the action figure customization boards, and in short order, found out that I wasn't the first person to have this problem.
In typical message board fashion I got the answer I was looking for:
Well, it turns out that not all sandable primers are created equal, and the brand I used has a difficult time adhering to plastic. Quite a few sites recommended that they have had much a better experience using a vinyl touch up paint.
I probably cursed myself by calling that last chapter "Crisis on Earth Prime" but if reading comics has taught me anything it's that - when faced with a Crisis - it's best to respond with a partial reboot... so:
"Lo, There Shall Come a Lard"
Part 7: Crisis on Earth Prime 2 - FINAL CRISIS!
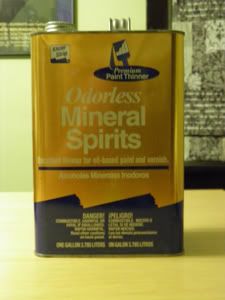
Well, DC has the Spectre to help out during their crises, but I had to rely on a different spirit:
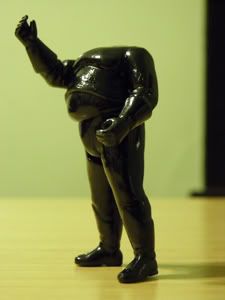
I stripped off all of the offending primer as best I could, leaving Lardy a bit worse for wear:
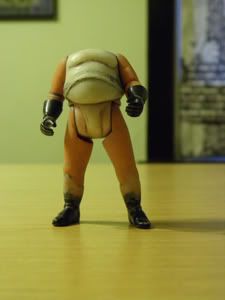
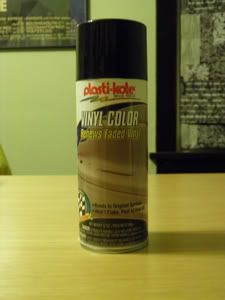
and tried the priming again, this time with the recommended paint:
I would have preferred to stick with grey, but after calling around, could only find black.
But... what a difference!
It goes on super-thin, better maintaining the detail than the original primer. It dries - not to tackiness, but to fully dry - in like 15 minutes. And... I don't have to sand it!
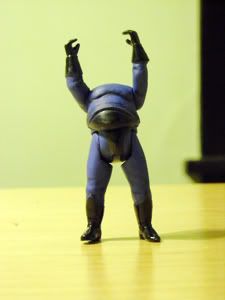
That means that newly primed Dark Lardy:
is now ready to paint.
Whoo-hoo!
-------------------- See Here for the latest update on the 2013 Chicago Gathering (now including tentative attendance list)
Registered: Feb 2008
| IP: Logged |
posted
Thanks, Shady. Yeah, the primer thing was a bit of a bummer (especially because I thought it looked so cool the first time) but, eh, live and learn.
I double checked the figure this morning, and noticed there was a little scuffing on his left arm, where it rubs against the belly, so I did a quick touch up before work but, overall he's looking good and I'll start painting him tonight.
Up until now I've focused on the body because I figured, since I was still getting the knack of this, I didn't want to experiment too much on the head, where little details would be more noticable. But now, since I have a little more confidence, I'll begin hatching a scheme on how best to do that. I've been debating whether or not I want to try to make his visor removable, because I think that would be a nice detail.
-------------------- See Here for the latest update on the 2013 Chicago Gathering (now including tentative attendance list)
Registered: Feb 2008
| IP: Logged |
So, I learned a couple of things about myself this past week:
1. Painting takes me a long time.
2. I find it very relaxing.
This step of the process requires so much focus on something so tiny, that I really just lose myself in the activity. I would get a section done and then look up and realize that four hours had just passed without even noticing it. Insane.
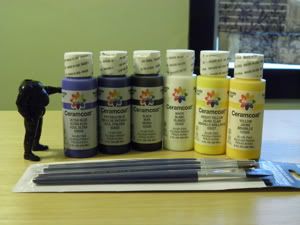
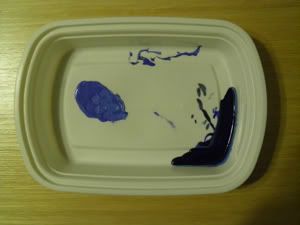
But, anyway, let's take a look at the process. First up... supplies:
I picked up a few bottles of acrylic paint at the craft store. These are super cheap, 59 cents apiece, so I got a couple shades of blue and yellow, along with a black and white to be able to mix to get what I was looking for. The tutorial I'm using said that I should use natural hair brushes, so I got a small variety pack.
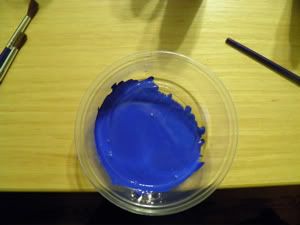
Now, on to the mixing. In dedman's pic of Lardy, the majority of his costume is a sort of highlighted dark blue, but I was working on a black primer, so I figured I'd try to go a bit lighter, adding more white.
After I got a nice approximation of the color, I watered it down - both to ensure that it went on thin enough to keep the detail of the folds in his costume, and to try to keep the visible brushstrokes to a minimum. The final consistency was a little thicker than milk:
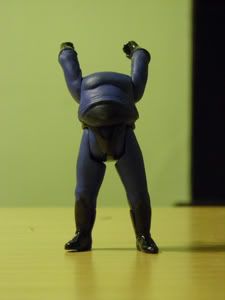
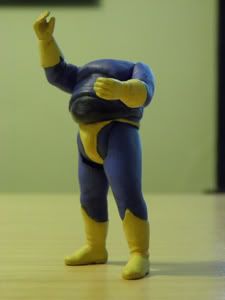
It took about three coats, and some spot touch ups to get a nice base:
After I got the base down, it was time to add some detail in the form of shadows and highlights. I mixed up both a darker and lighter version of my base color:
For the shadows, I used something called a wash, which is a very thin (2 parts water to one part paint) mixture of a darker shade of the base color. You basically just wet your brush with this wash and let it gently drip into the cracks and folds of the figure.
For the highlights, I did something called dry brushing, which means putting the tiniest bit of the lighter tint on the brush, then wiping it almost clean, and then very lightly almost "dusting" the figure on the natural light points.
This gave the figure much more definition, and really made me feel like I was making progress:
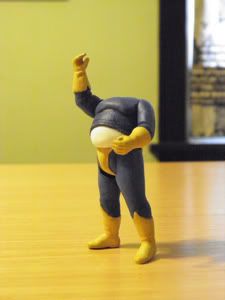
I then used the same process for all the yellow bits (which was a little bit harder, because now I had to keep a closer eye on my lines):
and then finally the white belly (which I washed by adding a couple drops of my original blue base to the white mixture):
An optional step that I decided to do at the end was to then sit in my living room admiring it and saying, "Sweetie... seriously... can you believe I actually made this?"
To which, apparently, the appropriate response is, "Yes, dear, your little doll body is very nice."
Next up: No talking, just head.
-------------------- See Here for the latest update on the 2013 Chicago Gathering (now including tentative attendance list)
Registered: Feb 2008
| IP: Logged |
-------------------- Just when you thought it was safe to go back in the water...
From: The waters off eastern Long Island | Registered: Jul 2003
| IP: Logged |
cleome46
or you can do the confusion 'til your head falls off
posted
I hope there's adequate ventilation in that workshop, though. I don't want to show up to this thread one morning and find out that Ex has been posting nothing all week but "Wahhhh! BUGS! Bugs are crawling all over meeeeeeeee!!"
-------------------- Hey, Kids! My "Cranky and Kitschy" collage art is now viewable on flickr. Drop by and tell me that I sent you.
From: Vanity, OR | Registered: Dec 2008
| IP: Logged |
Sorry this update took a while, but I really wanted to take my time with the head, because it is so tiny and easy to mess up.
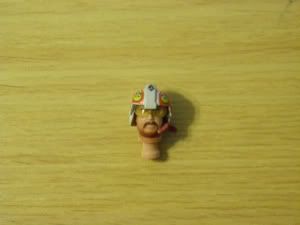
As I mentioned a little while back, I wanted to make the mask that Lardy wears removable. Thankfully, this figure came with a ready made, snap on helmet:
The whole thing is just made out of that transparent orange that you see in the visor - just painted - so I was able to whittle it down with a dremel to the size of Lardy's mask, and still have it fit the head perfectly.
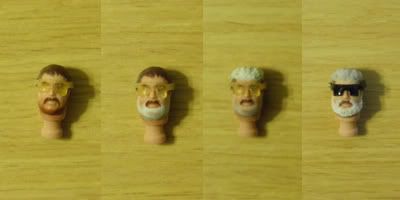
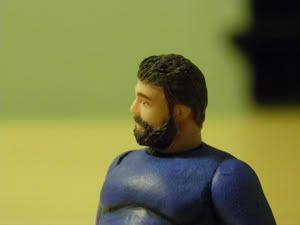
Additionally, leaving it on while I sculpted the hair and the beard gave me a nice guide as to how each should lie:
In the above sequence, you can see how I gradually added a little clay at a time (baking it in between each step), first getting the general shape, and then adding texture and detail (which I got by basically "combing" it with an X-acto knife.
In the final shot you can see that I primed the mask. I opted not to prime the head, because I had no illusions about being able to repaint the tiny eyes and not have them look ridiculous.
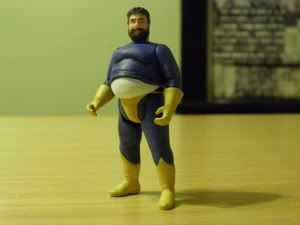
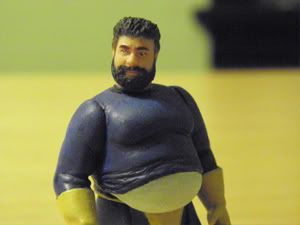
In any case, after I got the head fully shaped, I reattached it to the body and painted it:
I was soooo happy with how it turned out.
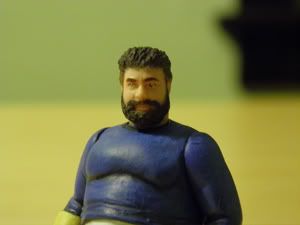
Here's a few glamour shots. Work it, Lardy:
aaaaaaaand... I'mmmmmmm..... spent.
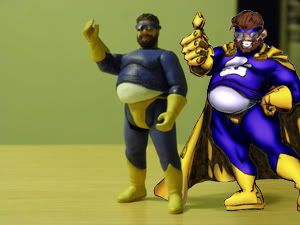
Finally, I painted the mask, and invited my original model over to take a look at his plastic brother and see what he thought so far:
Thumbs up!
Up next... finishing touches.
-------------------- See Here for the latest update on the 2013 Chicago Gathering (now including tentative attendance list)
Registered: Feb 2008
| IP: Logged |
Curious to see a closeup of the "mask". It's not actually what I would call a mask. Lardy wears a headband similar to Lyle Norg's and a pair of lenses that rest on his nose without the arms that rest on the ears similar Kent Shakespeare's.
(I say all this at the risk of activating your O.C.D., of course, but whatever you came up with is absolutely fine! )
I assume there will be an "L" symbol...and a cape?
-------------------- "Suck it, depressos!"--M. Lash
From: The Underbelly of Society | Registered: Jul 2003
| IP: Logged |


 Hyperpath: Email this page to someone!
 Printer-friendly view of this topic | Subscribe To Topic


![[LOL]](graemlins/lol.gif)
![[Smile]](smile.gif)
![[Yes]](graemlins/nod.gif)

![[Wink]](wink.gif)
![[Cool]](cool.gif)
![[Poke Joke]](graemlins/poke.gif)
![[Big Grin]](biggrin.gif)


